Understanding Child Restraint Categories
Child passenger safety in the United States is organized around four distinct restraint categories, each designed for a specific phase of a child's physical development. Understanding what separates them prevents the most consequential error caregivers make: transitioning to the next category too soon.
LATCH System
Lower Anchors and Tethers for Children - a standardized connection system built into US vehicles since 2002 that allows child seats to attach directly to dedicated anchors rather than routing through the seat belt.
Top Tether
A strap on a forward-facing child seat that connects to an anchor point on the vehicle structure above the seat. It limits how far forward the seat and child's head move during a crash.
Belt Path
The channel or routing guide on a child seat through which the vehicle seat belt or LATCH connector is threaded. Using the wrong belt path for the installation mode is a critical misuse error.
Chest Clip (Retainer Clip)
A plastic clip that holds harness shoulder straps in the correct position across a child's chest. It should sit at armpit level and is not designed to be a primary load-bearing component.
Five-Point Harness
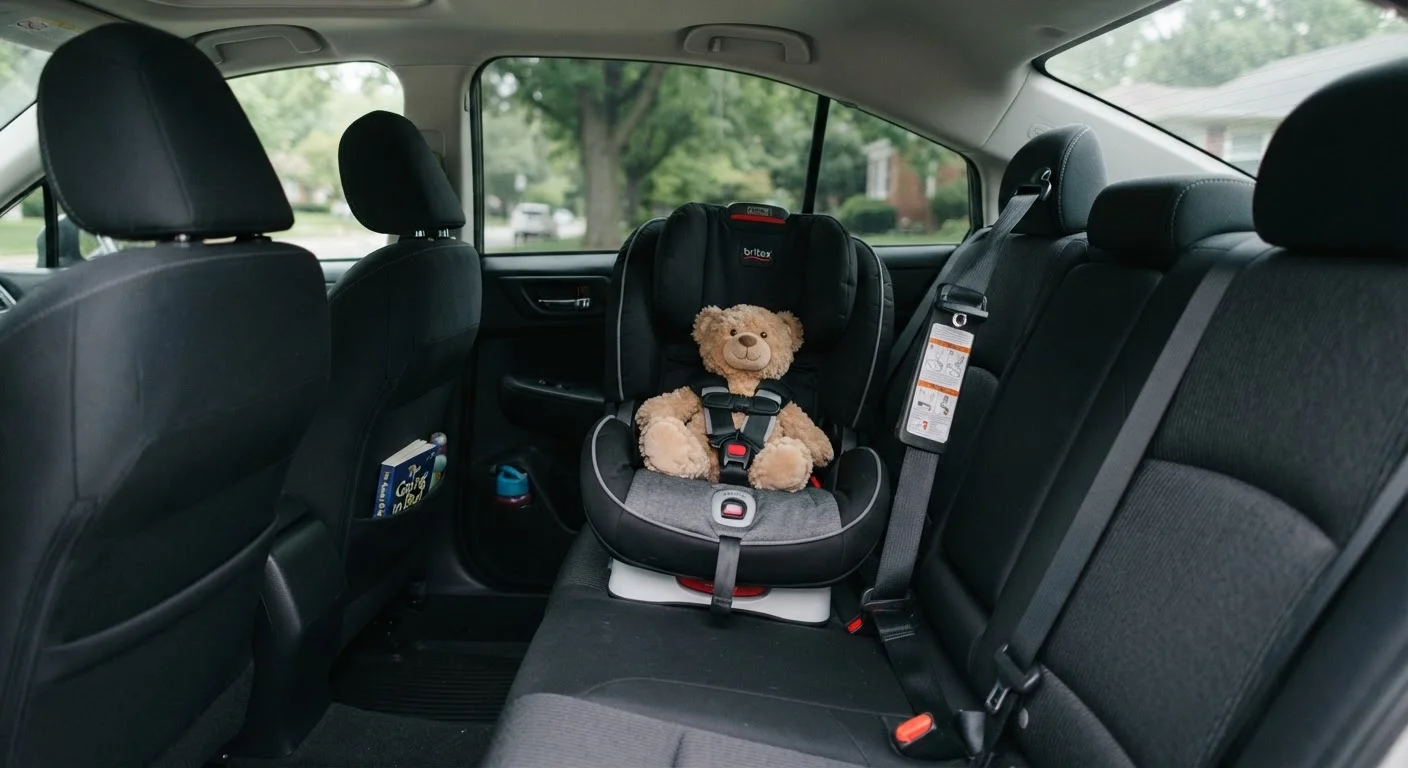
A restraint system with straps at both shoulders, both hips, and a crotch strap that all connect at a central buckle. It distributes crash forces across multiple strong points of the body.
Belt-Positioning Booster
A seat that raises and repositions a child so the vehicle's own seat belt crosses the body correctly - lap belt over the upper thighs and shoulder belt across the chest, not the neck or abdomen.
- Rear-Facing Only Seats
- Designed exclusively for infants and young toddlers. The shell cradles the head, neck, and spine during a frontal crash by distributing force across the child's back. These seats have a carry handle and a base that stays in the vehicle.
- Convertible Seats
- Accommodate children in both rear-facing and forward-facing orientations within a single shell, generally covering a wider weight range. They stay in the vehicle and do not have a carry handle.
- Forward-Facing Seats with Harness
- Used once a child has outgrown rear-facing limits. A five-point harness distributes crash forces across the shoulders, hips, and chest. Many convertible seats fulfill this role after being reconfigured.
- Belt-Positioning Booster Seats
- Replace the harness with the vehicle's own seat belt, which the booster repositions to cross the child's body correctly. Available as high-back or backless designs depending on vehicle headrest availability.
For a broader look at how restraint principles apply to adult occupants, see our overview of driver safety gear.
Weight, Height, and Age Guidelines
Age is a convenient shorthand, but manufacturers and safety engineers specify seats by weight and height limits - the measurements that actually reflect a child's physical fit within the restraint system. Following age milestones instead of stated limits is one of the most common misuses identified in observational studies.
General reference ranges (always defer to the specific seat's manual):
- Rear-facing: Birth through the seat's maximum rear-facing weight limit, commonly 35-50 lbs and up to approximately 49-54 inches depending on the model.
- Forward-facing with harness: Once rear-facing limits are exceeded, continuing until the child reaches the seat's forward-facing harness maximum - often 65-80 lbs on current models.
- Belt-positioning booster: After outgrowing the harness, until the vehicle seat belt fits correctly without assistance - typically around 4 ft 9 in tall and 80-100 lbs, though body geometry matters more than the number.
Keep Children Rear-Facing as Long as Possible
The rear-facing position spreads crash energy across the entire back, head, and neck rather than concentrating it at harness attachment points. Many convertible seats now support rear-facing to 40-50 lbs, which means most children can remain in this orientation well past age two. Check your seat's label - not a general age chart - to determine when the limit is actually reached.
Height matters as much as weight. A child whose shoulders exceed the top harness slot height on a forward-facing seat has outgrown it even if the weight limit hasn't been reached.
Installation Fundamentals: LATCH and Seat Belt Methods
Every child restraint sold in the US since 2002 must be compatible with the LATCH system. LATCH uses dedicated lower anchors built into the vehicle seat bight (the crease between cushion and seatback) and, for forward-facing seats, a top tether anchor - usually located on the rear shelf, seatback, or floor depending on vehicle design.
Key installation principles regardless of method:
- Consult both manuals. The vehicle owner's manual specifies LATCH weight limits per seating position and anchor locations. The car seat manual specifies routing paths. Both documents must be followed simultaneously.
- LATCH weight limits apply to the child plus seat combined. Many vehicles restrict LATCH use to 65 lbs combined weight; beyond that, the seat belt is required even if the seat itself supports LATCH to a higher weight.
- Always use the top tether on forward-facing seats. The tether reduces forward head movement in a crash by several inches and is mandatory on forward-facing installations in Canada; US guidelines strongly recommend it whenever an anchor is present.
- Recline angle matters for rear-facing seats. Most infant seats include a built-in level indicator. An incorrect angle can compromise both crash protection and airway safety for newborns.
For context on how multi-point restraints function structurally, our racing harness anatomy article explains load distribution principles that parallel child seat harness design.
Checking Fit: The Pinch Test and Harness Positioning
Installation secures the seat to the vehicle. Fit ensures the harness secures the child within the seat. These are two separate checks and both must pass.
Harness Slot Height
On rear-facing seats, harness straps must route through slots at or below the child's shoulders. On forward-facing seats, straps route through slots at or above the shoulders. Routing through the wrong slot fundamentally changes how crash forces are managed.
Chest Clip Position
The chest clip (retainer clip) should sit at armpit level - not at the belly, which could cause abdominal injury, and not at the throat. Its purpose is to keep harness straps on the shoulders, not to bear crash load directly.
The Pinch Test
After buckling and tightening the harness, pinch the webbing at the child's collarbone between thumb and forefinger. If you can gather any slack in the strap, it needs to be tightened further. A properly snug harness produces no pinchable fold.
Understanding correct fit across safety equipment types is a recurring theme - our guide to fitting safety gear correctly covers the underlying principles that apply beyond child seats.
Terminology Varies by Seat Type and Manufacturer
Terms like 'combination seat,' 'all-in-one seat,' and 'convertible seat' are used differently across manufacturers, which can make comparison confusing. Always read the specific weight and height limits printed on the seat label and detailed in the included manual rather than relying on category names alone. Our safety equipment glossary can help clarify terminology you encounter across documentation.
Common Mistakes and How to Avoid Them
Research from highway safety agencies consistently identifies misuse - not product defects - as the primary factor in child restraint underperformance. The most frequently documented errors include:
- Moving to the next category too early. Transitioning to forward-facing before rear-facing limits are reached, or to a booster before the harness limit is reached, removes a layer of protection the child still needs.
- Loose installation. More than one inch of movement at the belt path is the standard threshold. Loose seats allow excessive motion that the restraint was not designed to manage.
- Aftermarket accessories not tested with the seat. Head inserts, strap covers, and seat protectors not included with the original seat are not crash-tested as part of that system and can affect performance unpredictably.
- Second-hand seats without history. A seat involved in a moderate or severe crash may have structural damage that is not visible. Most manufacturers recommend replacing any seat that was in a vehicle during a crash meeting certain severity thresholds - check the manual for the specific criteria.
- Ignoring the vehicle rear seat and airbag interaction. Rear-facing seats should never be placed in front of an active frontal airbag. Our article on airbag system mechanics explains why deployment force makes this combination dangerous.
Never Place Rear-Facing Seats Before Active Airbags
A deploying frontal airbag can deliver force at speeds exceeding 100 mph. A rear-facing child seat positioned in front of an active passenger airbag puts the back of the seat - and the child's head - directly in the deployment path. Always place rear-facing seats in the rear of the vehicle, and check your vehicle manual to confirm which seating positions have active airbags.
If you are uncertain about your installation, contact a certified Child Passenger Safety Technician. The National Highway Traffic Safety Administration (NHTSA) maintains a publicly searchable inspection station locator at no cost to caregivers.
This article is for general educational purposes only. Always follow the specific instructions provided in your child restraint and vehicle owner's manuals, and consult a certified Child Passenger Safety Technician for hands-on guidance.