Why Car Batteries Fail Earlier Than They Should
A car battery does more than start the engine - it powers the entire electrical system when the alternator isn't generating output, absorbs voltage spikes, and sustains critical electronics during idle. Yet most drivers give it almost no attention until the morning it won't crank.
Lead-acid batteries (the most common type in conventional vehicles) degrade through a predictable set of stressors. Heat is the most damaging: sustained under-hood temperatures above 100°F accelerate internal plate corrosion and cause electrolyte loss. Cold weather, by contrast, temporarily reduces cranking power but does less long-term structural damage. Vibration loosens internal plate connections. And incomplete charging - common when most trips are under 20 minutes - promotes sulfation, a process where lead sulfate crystals harden on the plates and permanently reduce capacity.
Understanding these mechanisms is the foundation for effective battery maintenance. See also our guide on pre-winter vehicle preparation for how cold weather affects your battery alongside other vehicle systems.
Short Trips Are a Silent Battery Killer
Engine starts draw a significant burst of current. On trips shorter than 15-20 minutes, the alternator often doesn't have enough run time to fully replace that charge. Over weeks and months, the battery slowly cycles to lower and lower states of charge, accelerating sulfation and shortening its life. If your driving is mostly short urban trips, a monthly maintenance charge with a smart charger helps counteract this pattern.
Tools and What You'll Need
Checking battery health requires only a few inexpensive tools. None of the steps below require removing the battery from the vehicle.
What you will need
Digital Multimeter
Measures battery resting voltage to assess state of charge and detect significant capacity loss.
Battery Load Tester
Applies a controlled electrical load while measuring voltage drop, revealing how well the battery performs under real cranking conditions.
Wire Terminal Brush
Removes corrosion from battery posts and cable clamps to ensure a clean, low-resistance connection.
Smart Battery Maintainer / Trickle Charger
Keeps the battery at full charge during extended storage periods without overcharging.
Step-by-Step Battery Health Checks
Work through these checks in order. Each one takes only a few minutes and together they give you a reliable picture of your battery's current condition and remaining service life.
Perform a Visual Inspection
With the engine off and cool, open the hood and examine the battery. Look for:
- Case swelling or cracking: A bulging case typically indicates heat damage or overcharging. A battery in this condition should be replaced.
- Terminal corrosion: White, blue, or greenish powder around the posts signals oxidation that increases resistance and can cause starting problems.
- Loose cables: Grip each cable clamp and check for movement. Any play indicates a poor connection.
If corrosion is present, mix one tablespoon of baking soda with one cup of water and apply it to the terminals with an old toothbrush. Rinse with clean water and dry thoroughly before proceeding.
Test Resting Voltage with a Multimeter
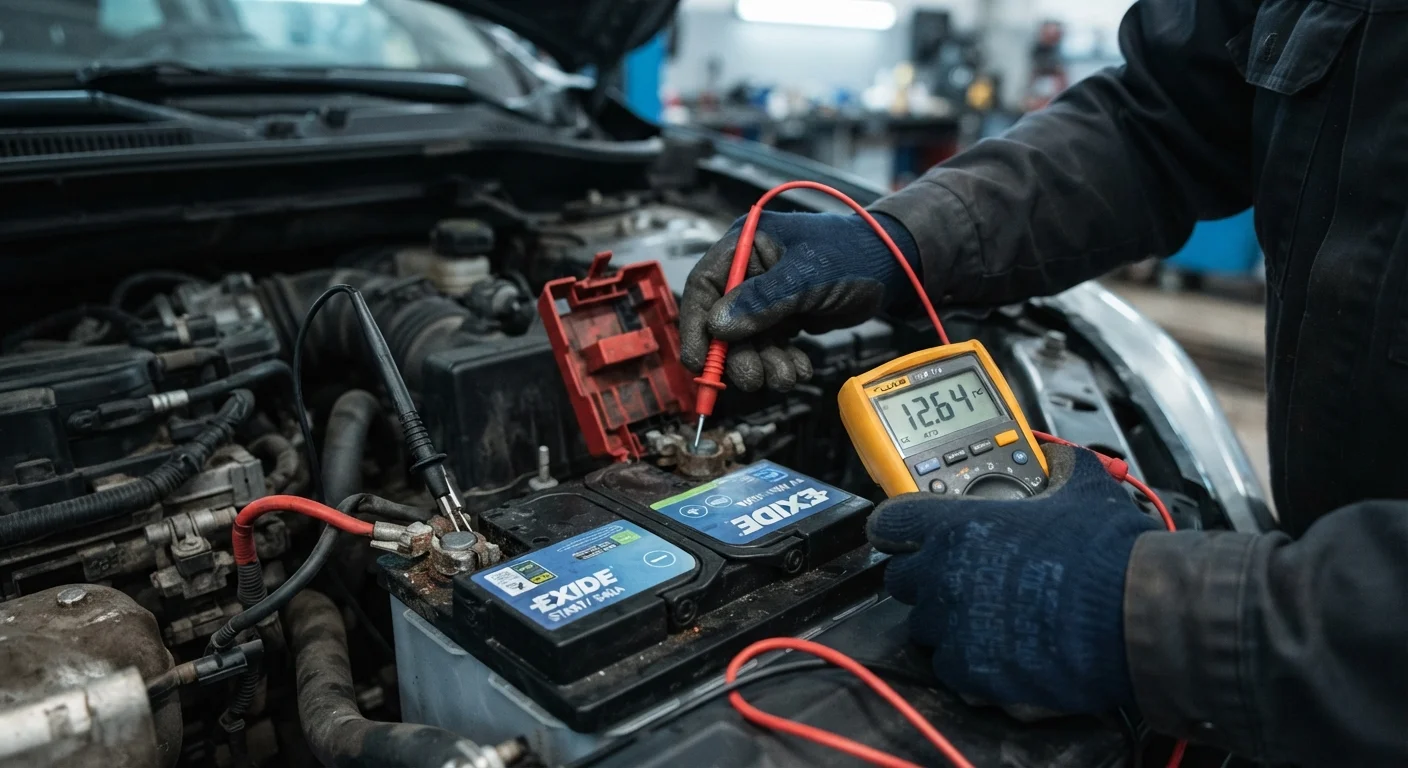
Set your multimeter to DC voltage (20V range). Connect the red probe to the positive terminal and the black probe to the negative. The engine must have been off for at least two hours for an accurate resting voltage reading.
| Resting Voltage | Approximate State of Charge |
|---|---|
| 12.6 V or above | Fully charged |
| 12.4 V | ~75% charged |
| 12.2 V | ~50% charged |
| Below 12.0 V | Discharged - investigate further |
A reading consistently below 12.4 V after a full charge cycle suggests reduced capacity and warrants a load test.
Conduct a Load Test
A load tester stresses the battery at approximately half its Cold Cranking Amp (CCA) rating - a figure printed on the battery label - while monitoring voltage. Connect the tester according to its instructions and apply the load for 10-15 seconds.
A healthy battery will hold above 9.6 V throughout the test at room temperature. A reading that drops below 9.6 V indicates the battery cannot sustain adequate cranking power and is nearing the end of its service life. Many auto parts stores offer free load testing if you don't own a tester.
Check the Charging System
A battery that repeatedly discharges may not be the root cause - a failing alternator won't fully recharge the battery between drives. With the engine running, connect your multimeter to the battery terminals again. A healthy charging system should read between 13.7 V and 14.7 V.
A reading below 13.5 V with the engine at idle suggests the alternator output is insufficient. A reading above 15 V indicates possible voltage regulator failure, which can overcharge and damage the battery. Either condition warrants a visit to a qualified mechanic.
Record and Track Your Results
Battery health declines gradually. A single test gives a snapshot; a series of tests over months reveals the trend. Note the date, resting voltage, and load test result in a simple maintenance log - a notes app on your phone or a paper logbook both work. When resting voltage after a full charge starts falling below 12.4 V consistently, or a load test shows voltage dropping under 9.6 V, begin planning for replacement rather than waiting for a failure.
Most conventional lead-acid batteries have a realistic service life of three to five years depending on climate, usage pattern, and maintenance. AGM (Absorbent Glass Mat) batteries, increasingly common in vehicles with start-stop systems, typically last longer but are more sensitive to deep discharge.
Smart Chargers vs. Basic Trickle Chargers
A smart charger (sometimes called a battery maintainer) automatically monitors charge level and switches to a float mode when the battery is full, preventing overcharging. Basic trickle chargers lack this regulation and can damage a battery if left connected indefinitely. For any vehicle stored longer than two weeks, a smart charger is worth the modest investment.
For vehicles that sit for extended periods - such as classic cars stored through winter - a battery maintainer is particularly important. Our guide on storing and maintaining a classic car through the off-season covers this and other long-term storage practices in detail.
Daily Habits That Extend Battery Life
One-time checks matter, but sustainable habits do more to extend battery working life over years of ownership.
- Avoid excessive short trips. If your daily driving rarely exceeds 15-20 minutes, the alternator may not fully recharge the battery between cycles. A periodic longer drive or a once-monthly maintenance charge with a smart charger offsets this.
- Reduce parasitic loads. Accessories left on after engine shutdown - including aftermarket audio systems, phone chargers, and dashcams wired to constant power - draw small but continuous current. These parasitic drains can discharge a battery overnight if the load is high enough.
- Park in shade or a garage when possible. Reducing ambient heat exposure slows internal degradation, especially in warmer climates.
- Keep the battery securely mounted. Vibration from a loose battery tray accelerates internal plate separation. Check the hold-down bracket periodically.
These habits apply equally whether you drive a daily commuter or a weekend vehicle. For a broader look at staying ahead of component wear, see keeping wear parts in good shape.
When to Stop DIY and See a Mechanic
Battery maintenance checks are genuinely beginner-friendly, but certain findings require professional attention. A swollen or cracked battery case, charging system voltage outside the 13.7-14.7 V range, or a battery that won't hold a charge after two full conditioning cycles all indicate problems beyond routine upkeep. A qualified mechanic can properly diagnose alternator or voltage regulator issues and handle battery disposal safely, as lead-acid batteries contain hazardous materials requiring regulated recycling.